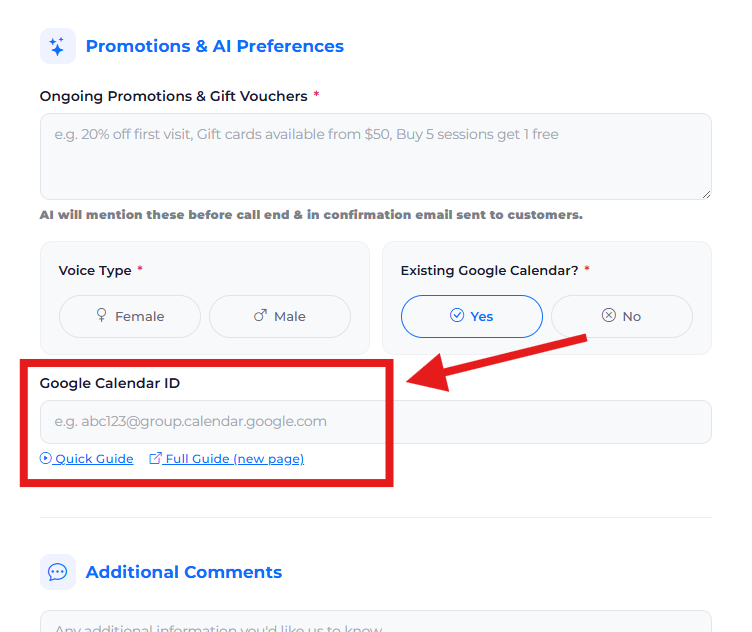
How-To: Setting up Google Calendar & Getting Calendar ID
Follow the steps below to set up your Google Calendar for AI Araya integration.
Video Guide
Watch this video walkthrough to help you set up Google Calendar step by step. We recommend screen sharing with our team during this process.
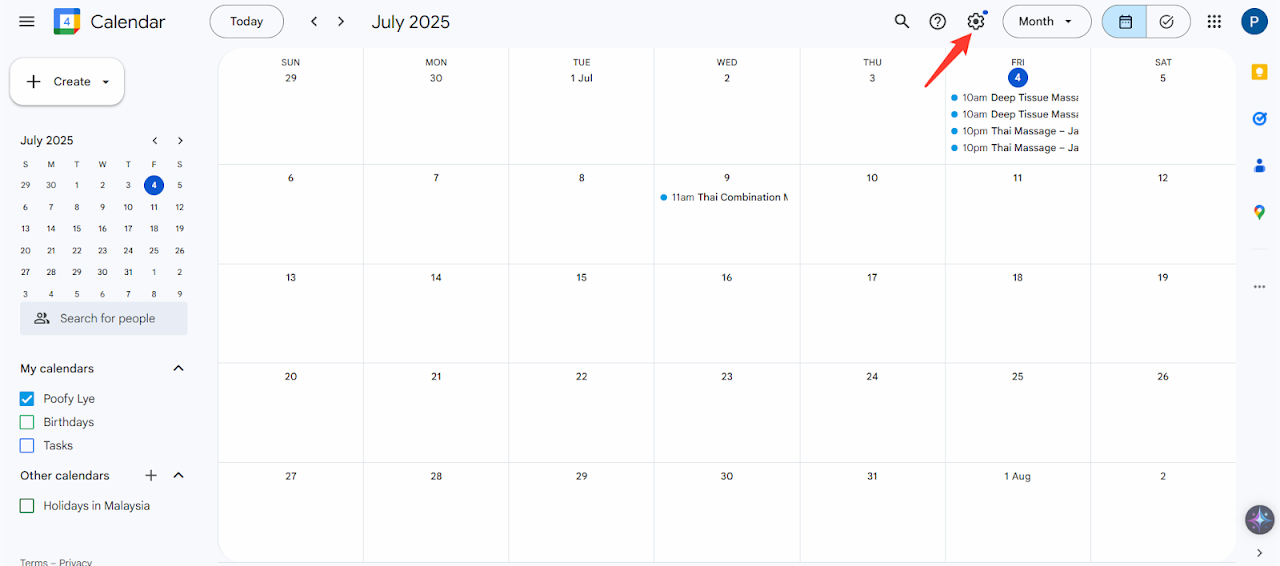
Navigate to Google Calendar Settings
Open Google Calendar in your browser and click the gear icon (⚙️) at the top right, then select "Settings".
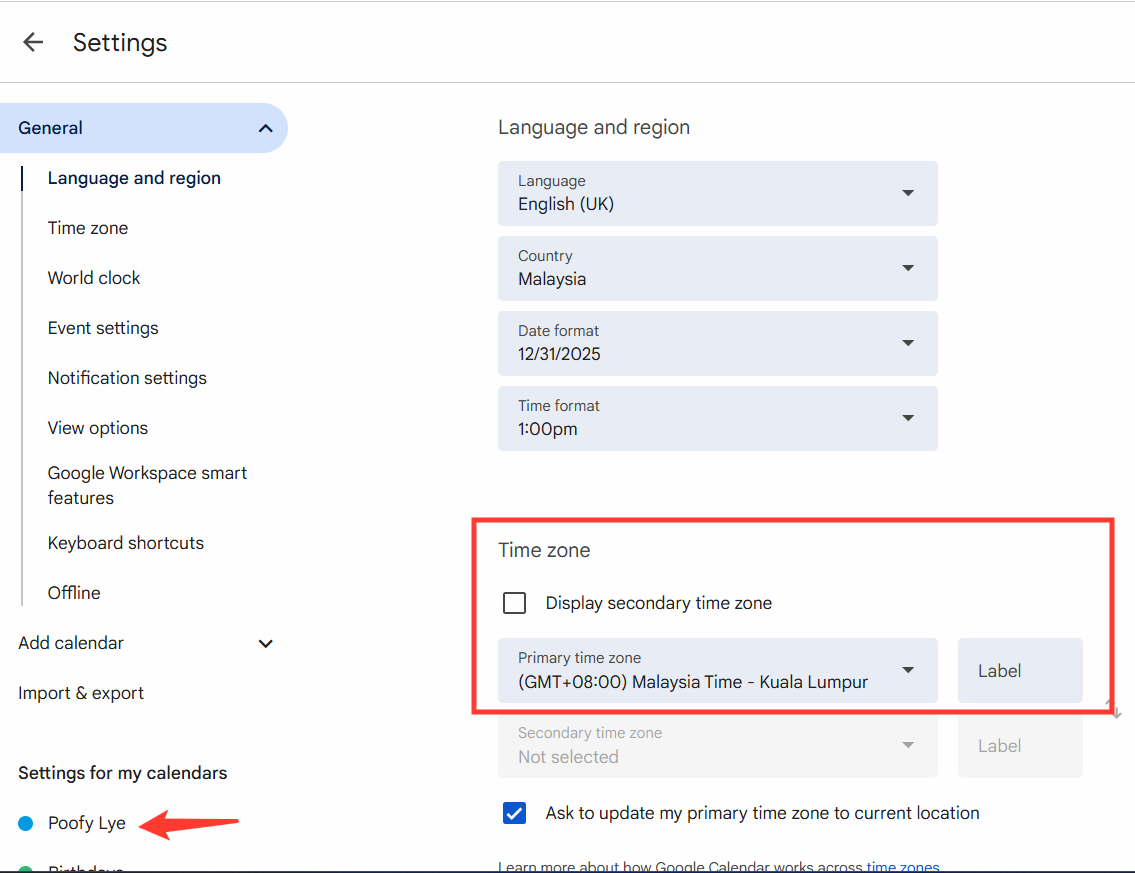
Verify Time Zone
In the General settings, check that the Time zone matches the timezone you'll use in the AI Prompt configuration.
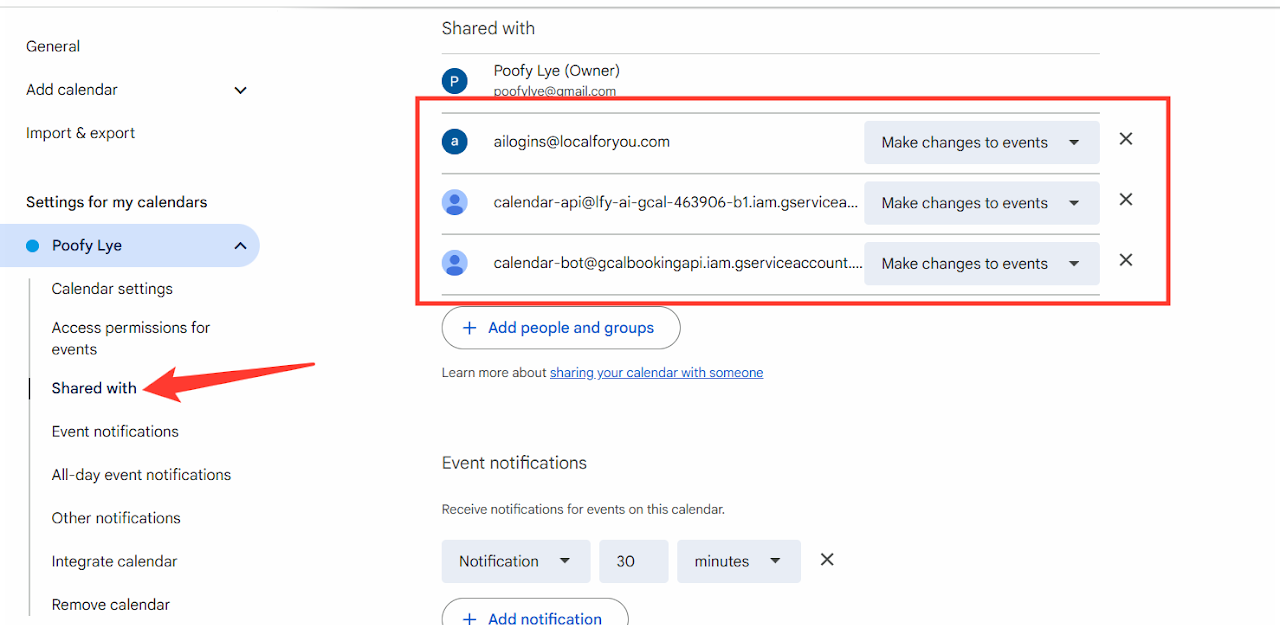
Share Calendar with Required Accounts
In the left sidebar under "Settings for my calendars", click on the shop's main calendar name.
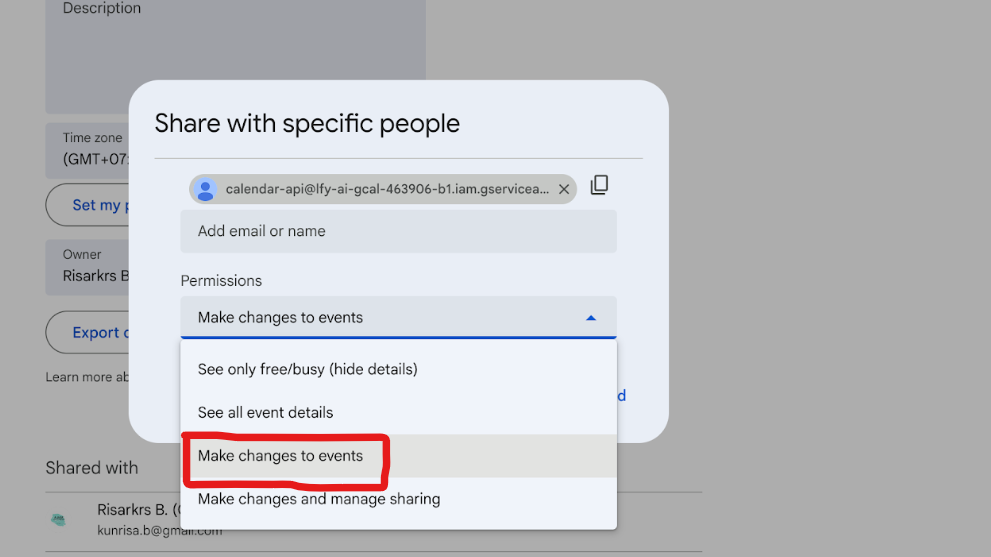
Scroll down to the "Share with specific people or groups" section and click "+ Add people and groups".
Add each of the following email addresses with the permission :
calendar-bot@gcalbookingapi.iam.gserviceaccount.com
ailogins@localforyou.com
Get the Calendar ID
Still in the same calendar settings, scroll down to the "Integrate calendar" section.
You'll see a field labeled "Calendar ID" — copy this value.
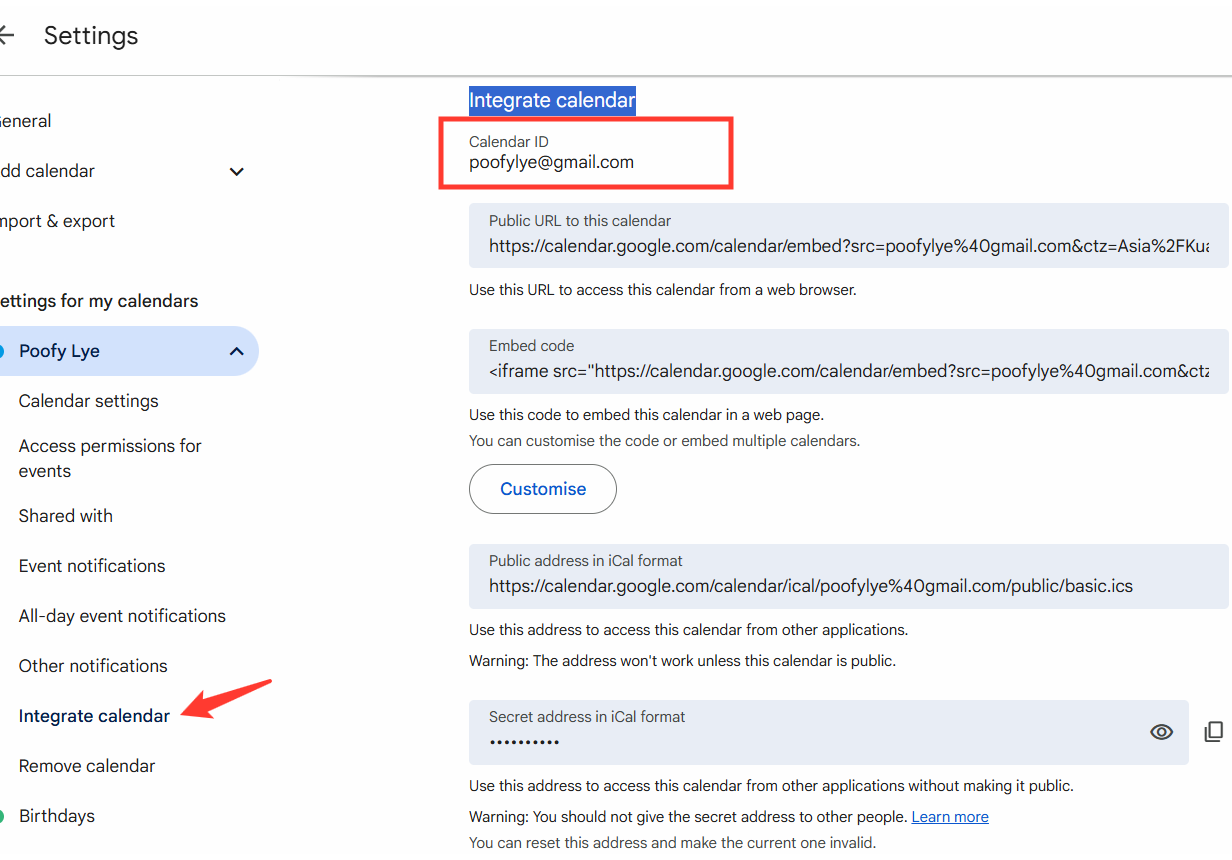
Paste the Calendar ID into the Google Calendar ID field in the customer details form (or the Edit Shop section in the admin dashboard).